
From STL to Solid
How to go from a file all the way to a finished print.
Shoutout to my brother, who gave me the great idea for this blog post. I hope this helps!
General Workflow
Your workflow is going to look like this
Download an STL or 3MF file
Import that file into a slicer
Slice the file with the settings you want
Either remotely tell your printer to print the sliced file, or save the sliced file to a USB stick that you then plug into your printer.
We will go in depth on each step below
Note: Haven’t started up your printer yet, connected it to WiFi, etc? Do that first before continuing and reference the user manual!
Background: How does a 3D Printer Work?
This is some additional information that may be helpful in understanding how a slicer works later on.

How a 3D printer works
3D printers, also called FDM (Fused deposition modeling) printers, work by laying down very thin layers of plastic over and over again. This plastic builds up to eventually make the model you asked it to print.
Where Can I Get Free Models?
There are a lot of sites that you can get models from, but these are the best in my opinion
What’s A Slicer?
A slicer is a piece of software that takes a model file (STEP, STL, 3MF) and “slices” it into layer-by-layer instructions, called G-code, your printer can understand. It has many features that you can use to control exactly how your printer prints the model like layer height, width, and much more.

Slicer Terminology and Basics
Every aspect of your printer is connected and determines how well it prints - the printer, the filament, and how you tell the printer to behave while printing, but there is a cascading relation to those aspects.
The relationship goes: printer -> filament -> process/quality profile
Your printer definition is based on your physical hardware, which you are physically limited by your hardware,
This effects what filament you can print
You need an enclosure to print ASA/ABS
You need a hardened nozzle to print carbon fiber-infused filament
You need a direct-drive extruder to print TPU
This effects how you can tell your printer to behave
You can’t print at 1000mm/s with a Cartesian-style printer
These settings are logically constrained to your printer definitions in OrcaSlicer, although there aren’t settings like “I don’t have a direct drive extruder, so don’t let me print TPU” or “I don’t have an enclosure”. That is up to you.
Your filament definition is also based on something physical - the spool of plastic you have hooked up to your printer.
The filament effects how you can print:
Some filaments can be printed fast, others slow
Some filament likes maximum cooling, some like almost none
Some filaments like a lot of build plate heat and high hotend temps, others don’t need a heated build plate
These settings are logically constrained to your filament definitions in OrcaSlicer
Your Process and Quality profiles define how your printer behaves while printing, and is constrained by the above 2 aspects
This effects structure
How many walls
How many bottom layers
what the hollow portions are filled with, etc.
This effects Speed - within the constraints of your Printer profile and filament profile
My profiles are more centered around performance and quality, rather than being linked to a type of filament
These settings are logically constrained to your process an quality profiles in OrcaSlicer
Which Slicer Do I Download?
This is hot topic of debate, and there isn’t really a “right” answer. Some are aimed at stability, while others are aimed at adding bleeding-edge features, but they all do the same thing.
Personally, I really like OrcaSlicer. It has an active development community and constantly adds new features and techniques drafted up by its users and research community
You can download the latest release here
How Do I Use My Slicer?
Setup
Make sure OrcaSlicer is installed. If you’re having trouble, you can reference this tutorial
If you see a screen asking you to log in, you can use your BambuLabs account to sign in here.
There are 2 benefits to this
All your printer configs will be synced to the cloud
This allows you to send prints directly to your BambuLab printer
You’ll then see a screen to add your printer.
Note: Make sure you select the printer profile with the nozzle size that matches what is installed in your machine! 0.4mm nozzles are usually the default

Printer Selection Page
You can use the search bar to find the one you own. Make sure you select the checkbox next to the correct nozzle size installed in your printer. Then hit “Confirm”
Initial Configuration
Make sure you’re in the “Prepare” tab
Each printer comes with its own default printer profile and settings, so you don’t have to worry about changing anything if you don’t want to
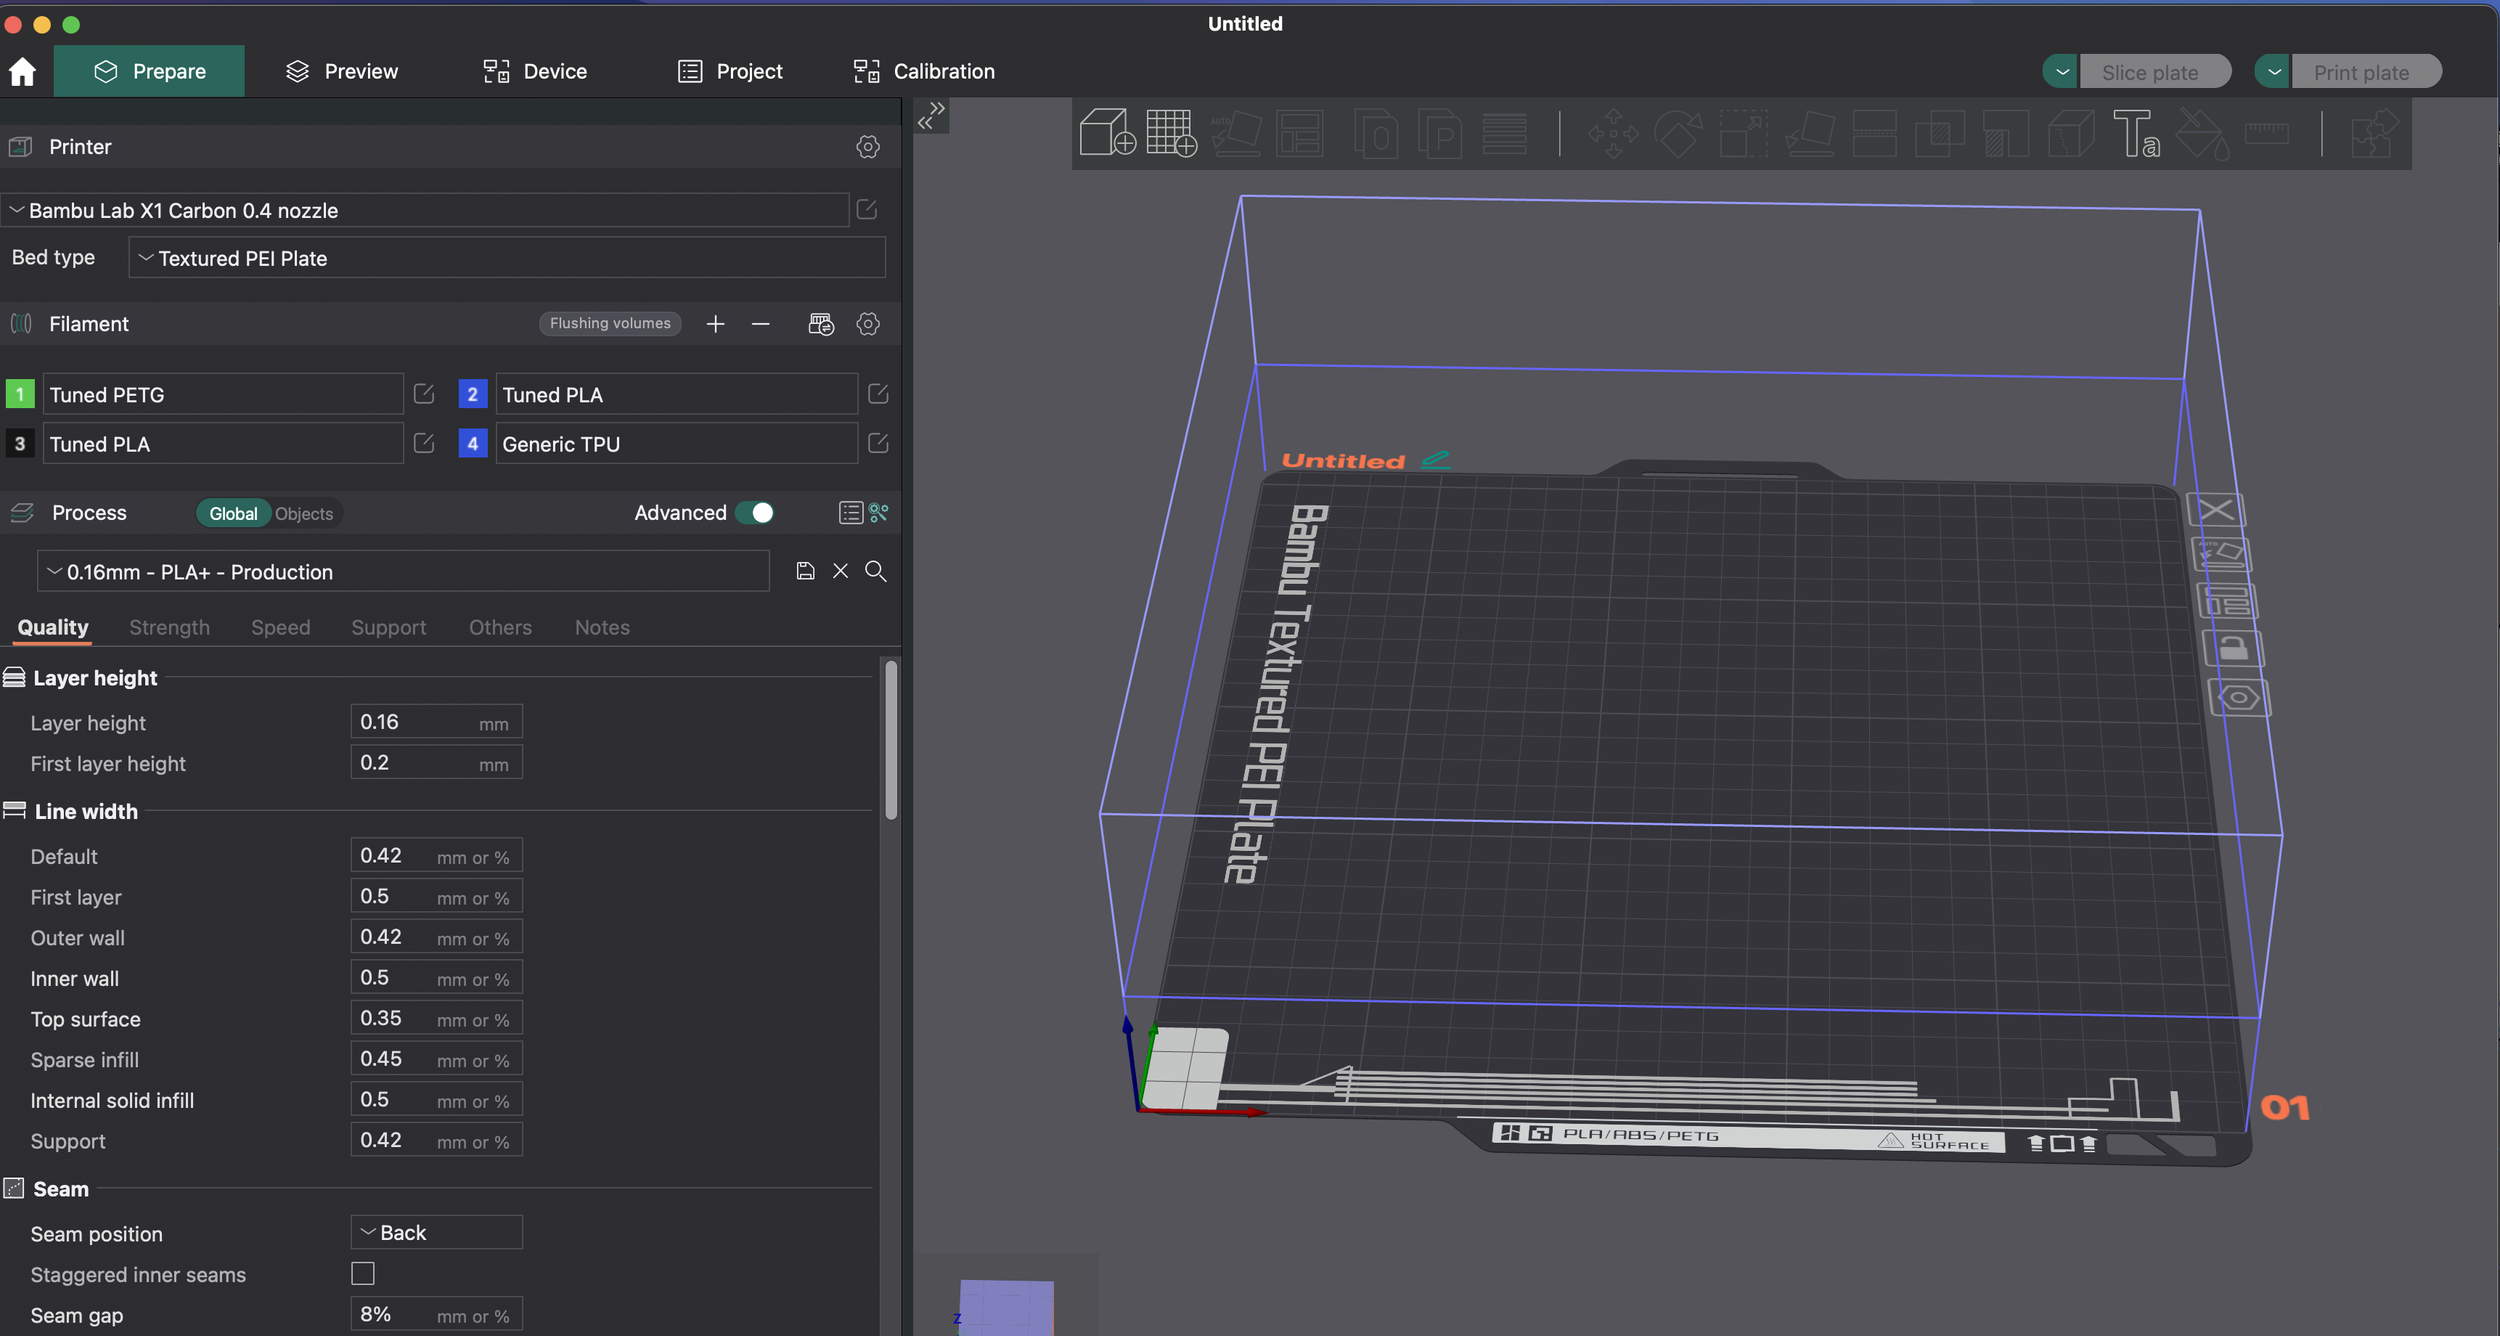
“Prepare” tab
This is where you’ll add models, adjust settings, slice, and send sliced files off to your printer.
Download your model
You can use any model that is a STL, 3MF, or STEP file, but for this demo we’re going to be printing this guy and continue this guide focusing specifically on Printables.com
Download the model, detailed by the images below

Printables download page
Click on “Download” to be taken directly to the “Files” tab.
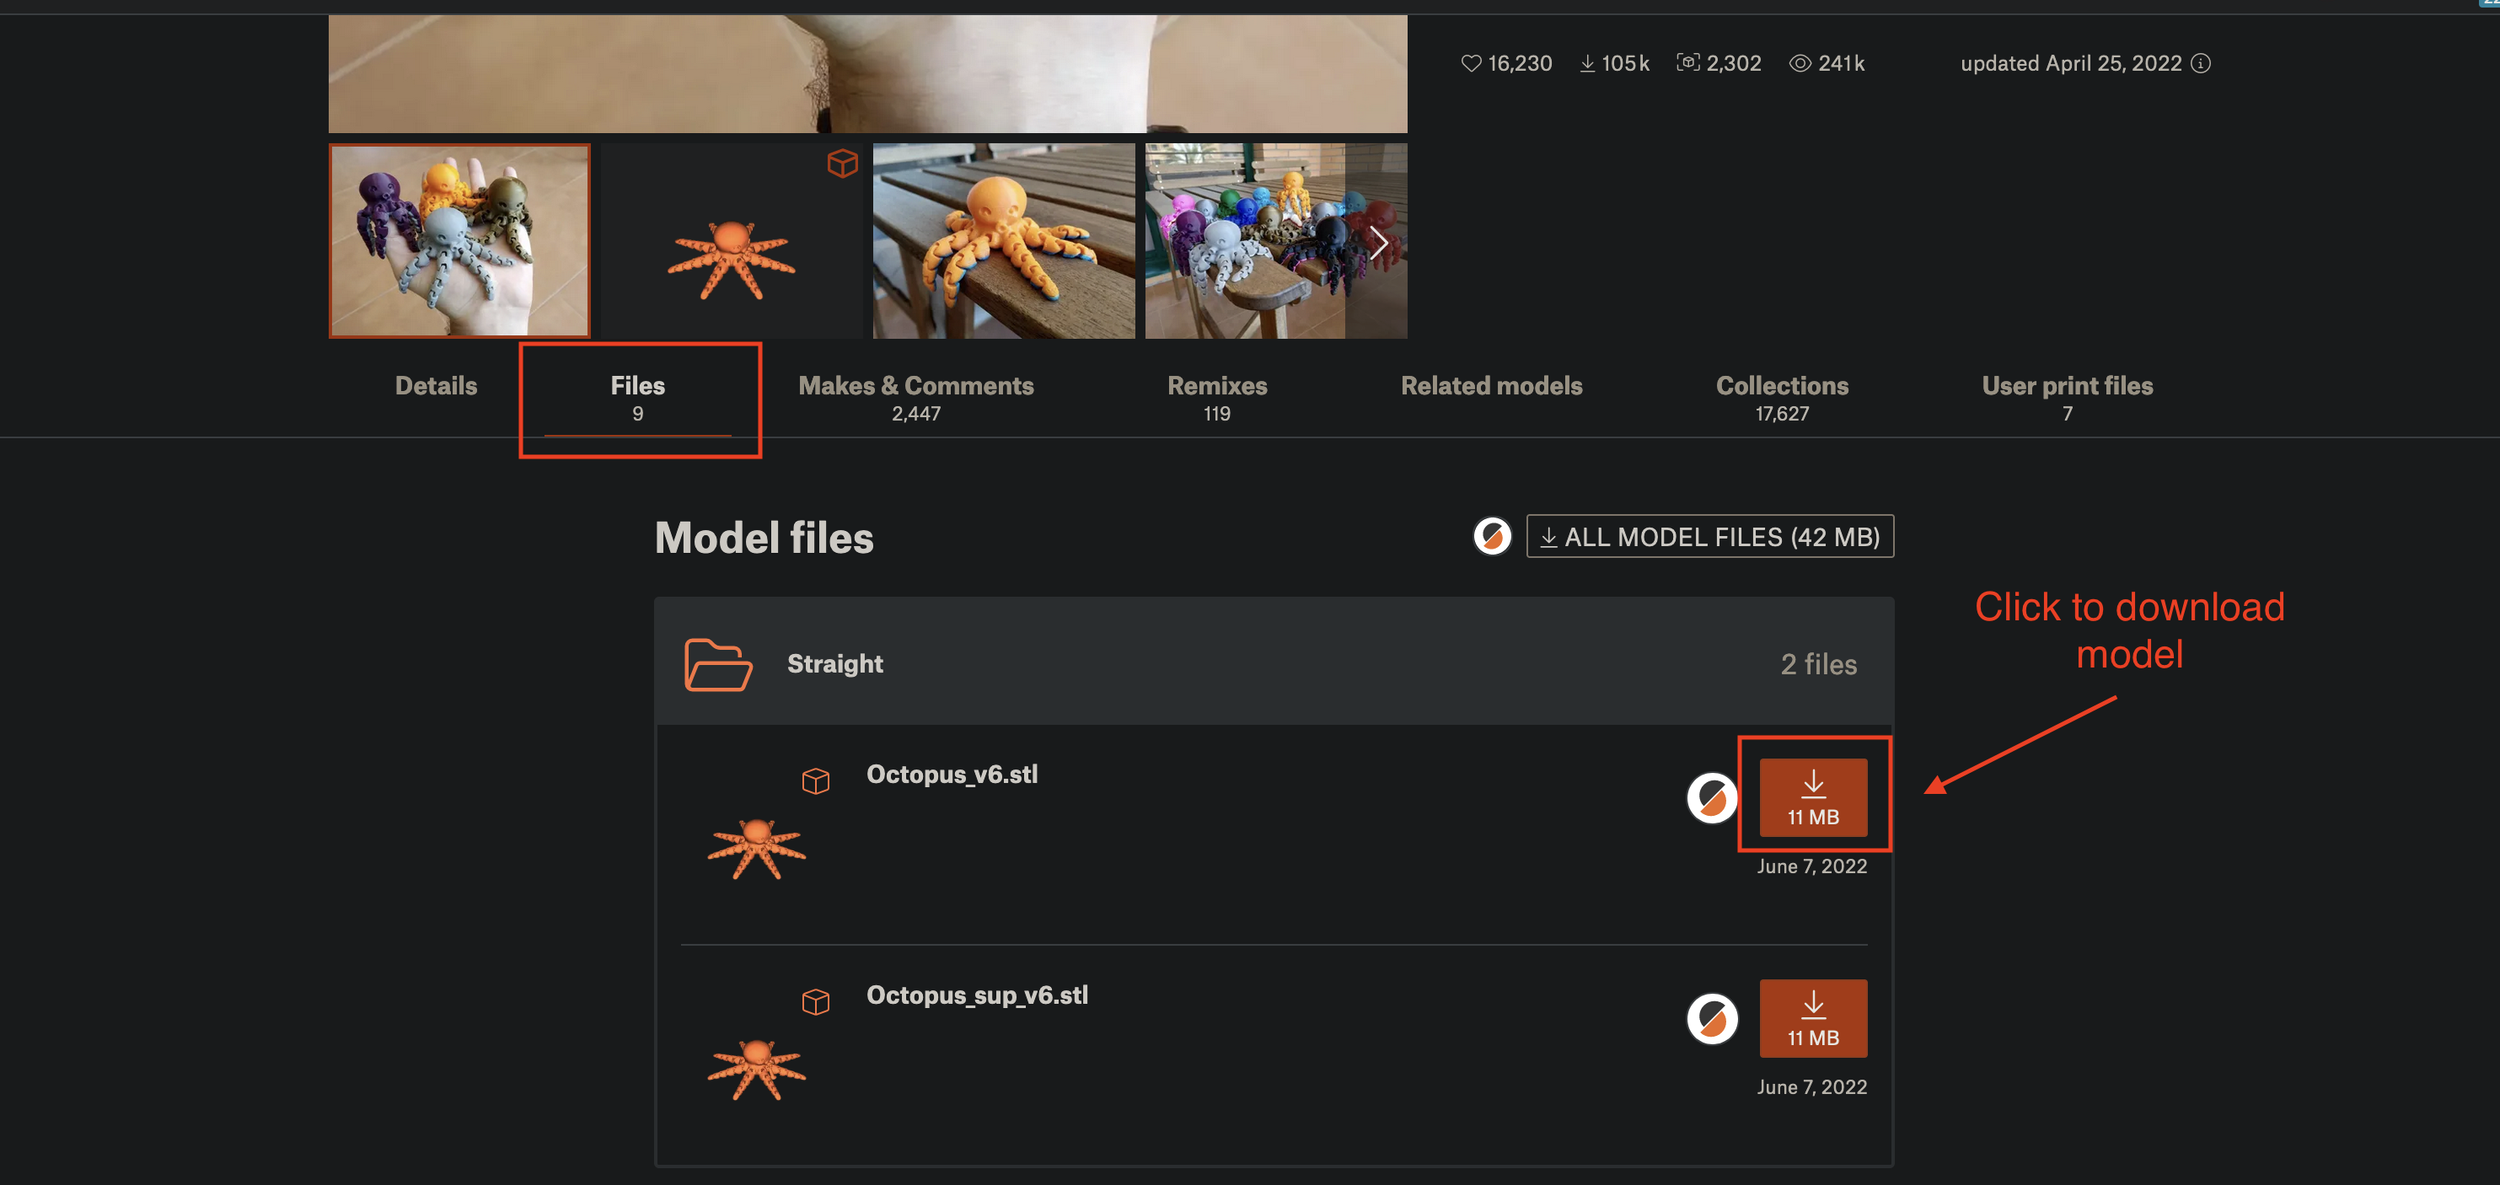
“Files” tab
Whatever it is, the way you tell your story online can make all the difference.
Prepare your model
Find the model you downloaded on your computer
Drag that file into the “Prepare” window of OrcaSlicer, which looks like an empty build plate.
Select a filament profile under “System presets” in the dropdown menu that matches the material you have loaded into your printer.
Select a process profile under “System presets” in the dropdown menu

Download Folder -> OrcaSlicer
Drag the file you downloaded into the OrcaSlicer “Prepare” tab.

Confirm you see the same!
You should now see your model, or the octopus, on the build plate.
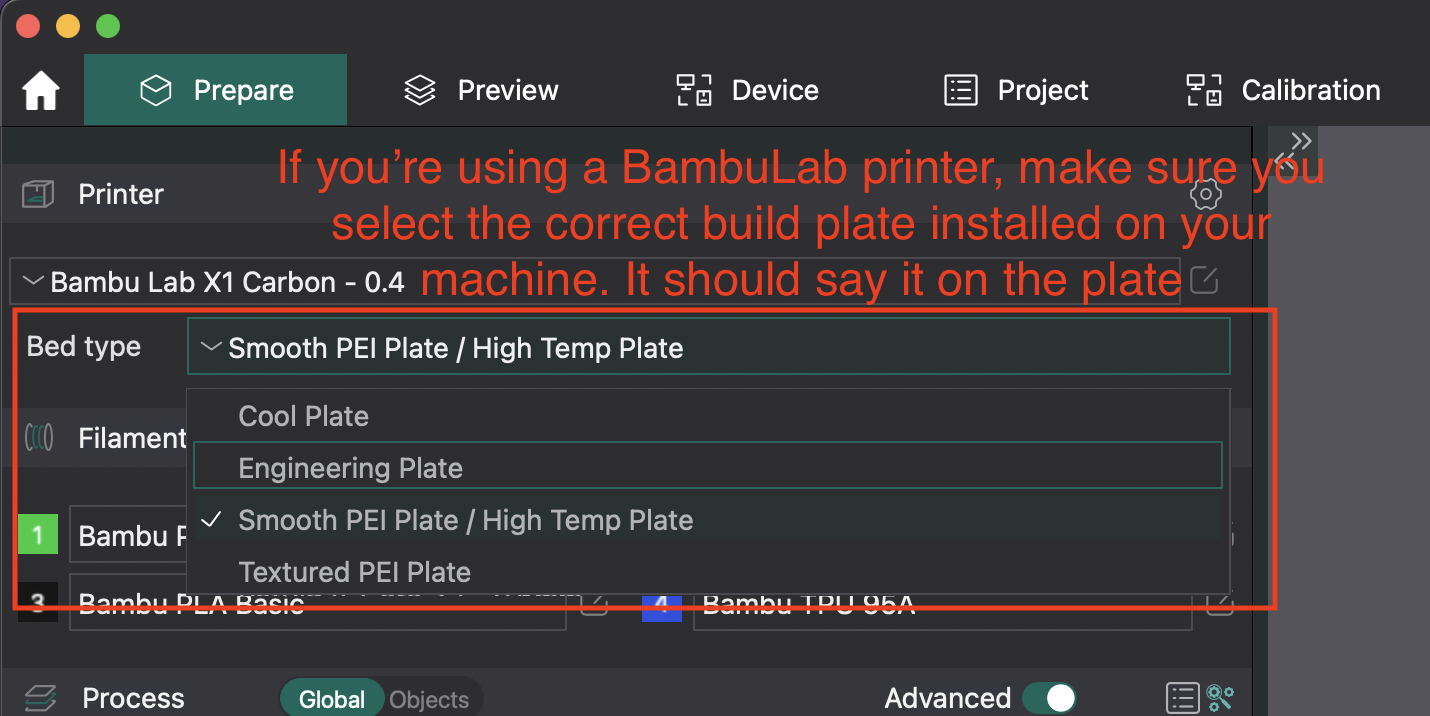
BambuLab Users: Make sure your build plate matches!
Make sure you select the right build plate, or else the BambuLab printer will give you an error when you try to print it.
Slice You Model
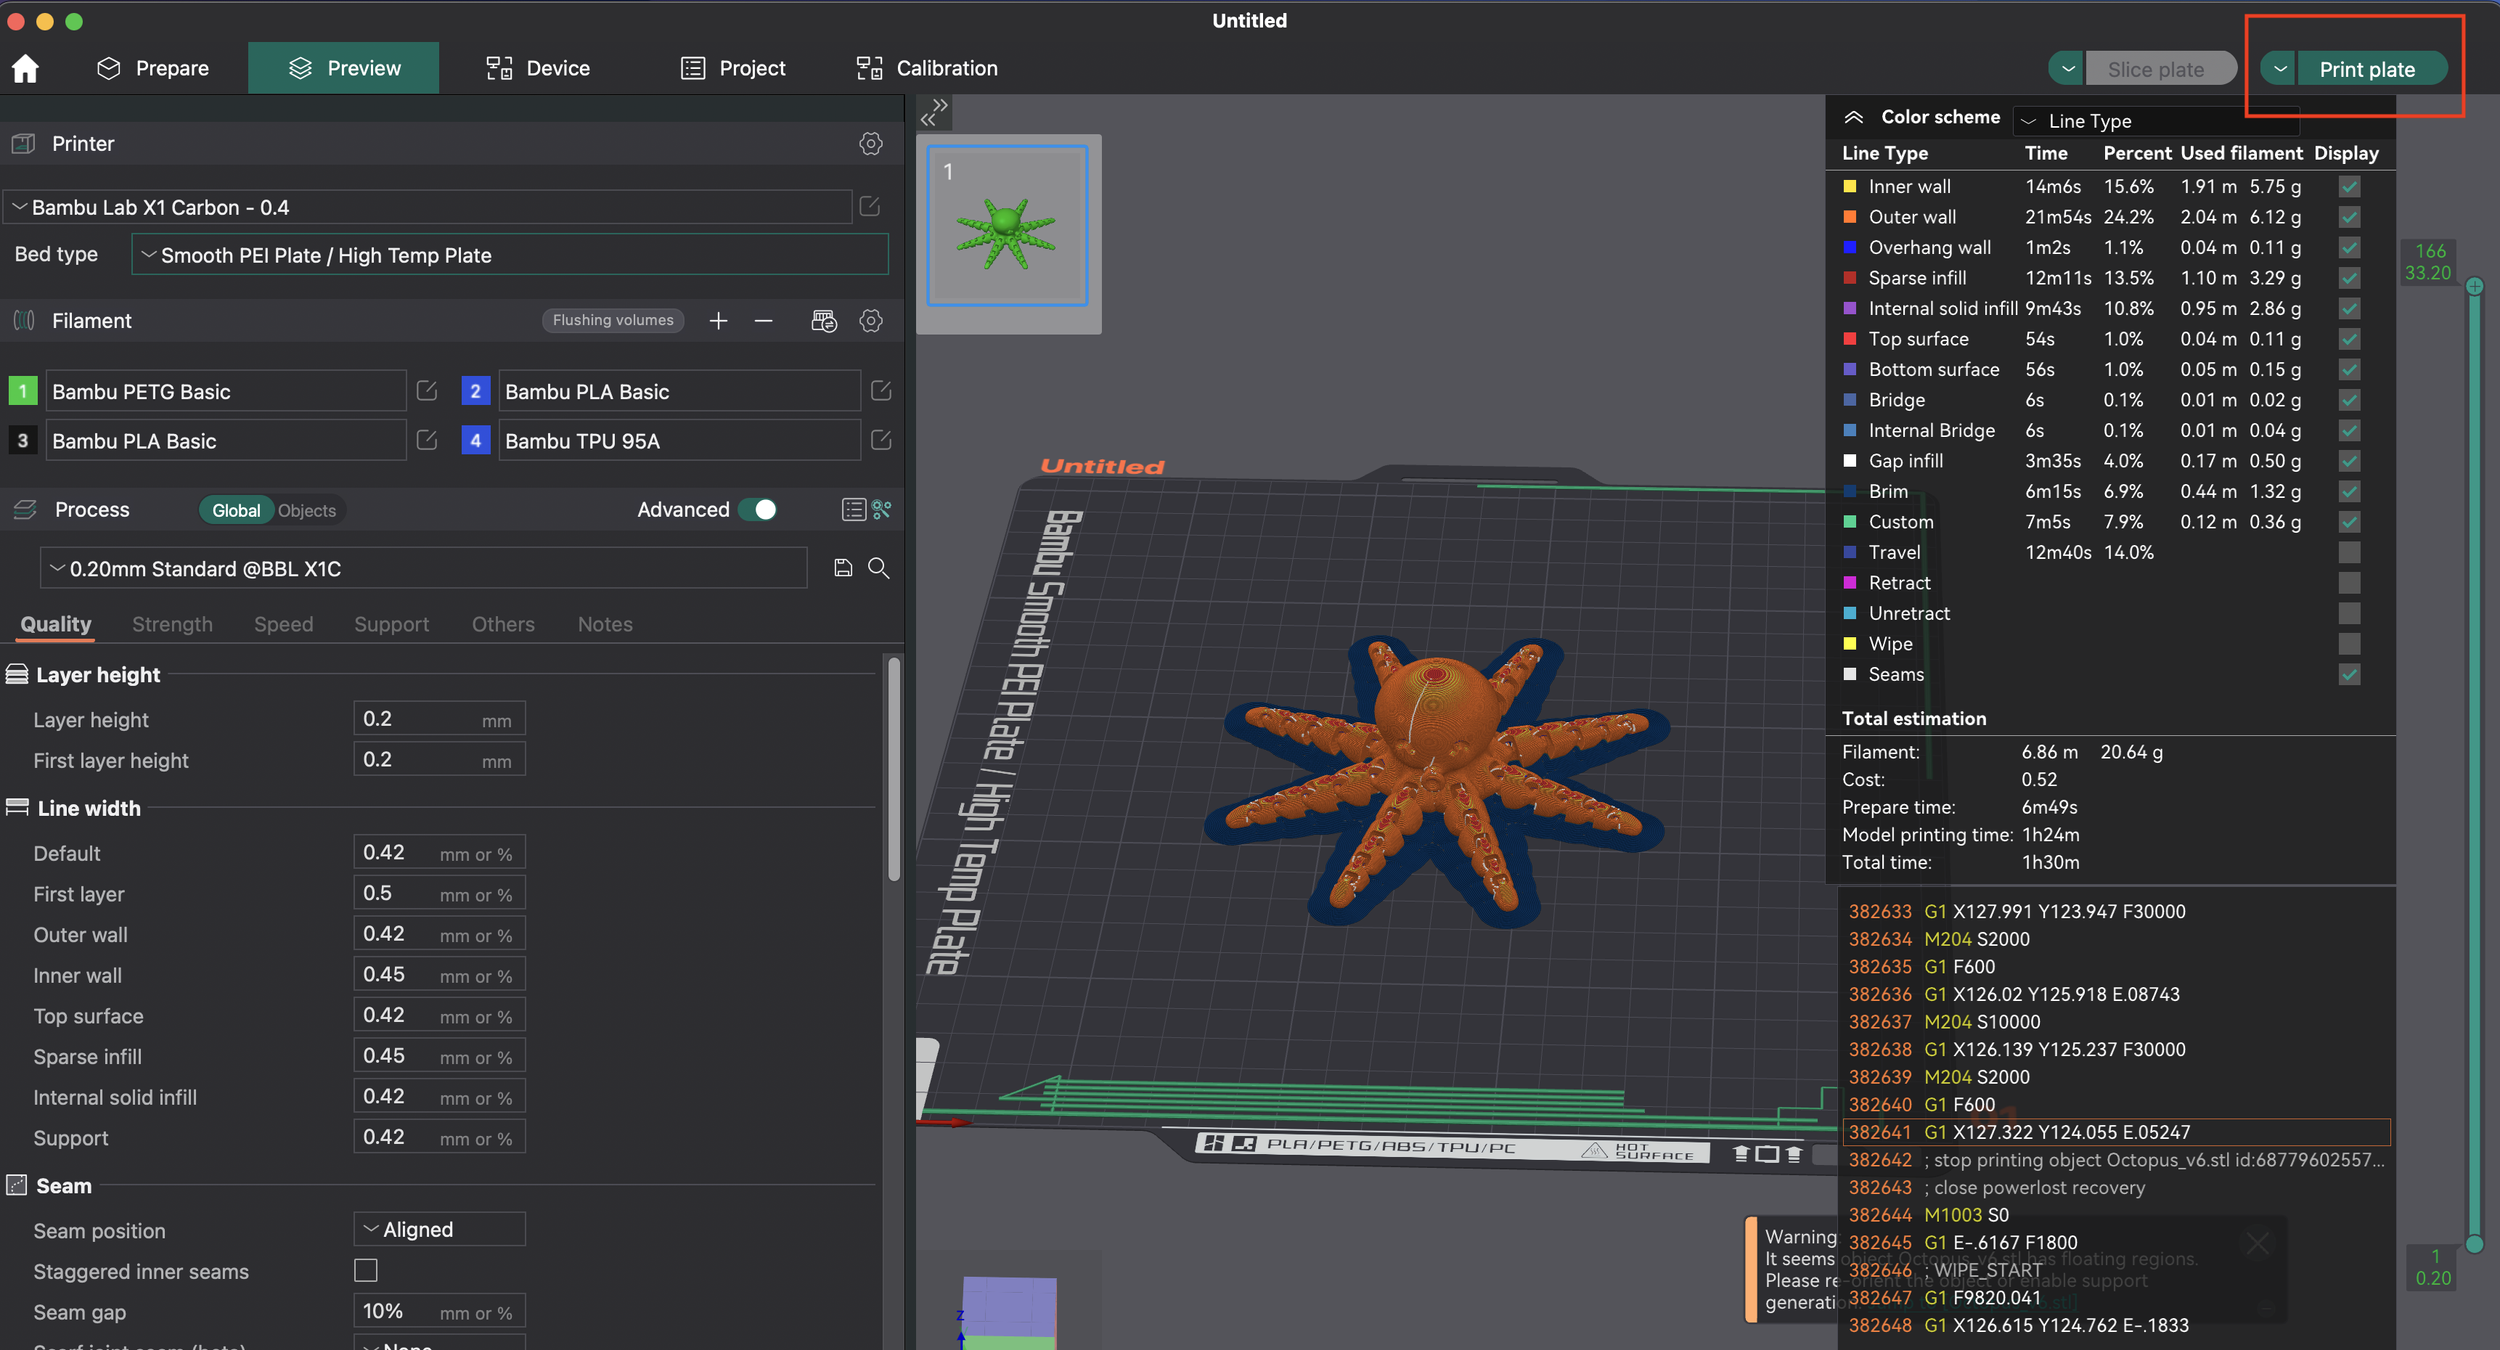
The moment of truth - lets hit “Slice plate” and generate some instructions our printer can understand!
You should see the “Print plate” Icon in green now if the slice was successful, and a lot of gibberish (Those are the instructions for the printer) on the right-hand side of the screen.

Slice it
Hit slice and wait for OrcaSlicer to finish generating the G-code.
Print it
We’re ready to send it to the printer now.
Print Your Model
This is going to differ depending on the printer you have, but I’ll cover a few of the most common cases.
BambuLabs Printers
This should be pretty easy as long as you’ve logged into your BambuLabs account and see your device in the “Devices” tab
Hit “Print plate”
Select the options you want from the pop-up window
“Flow Dynamics Calibration” is always good to have on in my opinion
“Enable AMS” should be selected if you have an AMS system
Hit “Send”
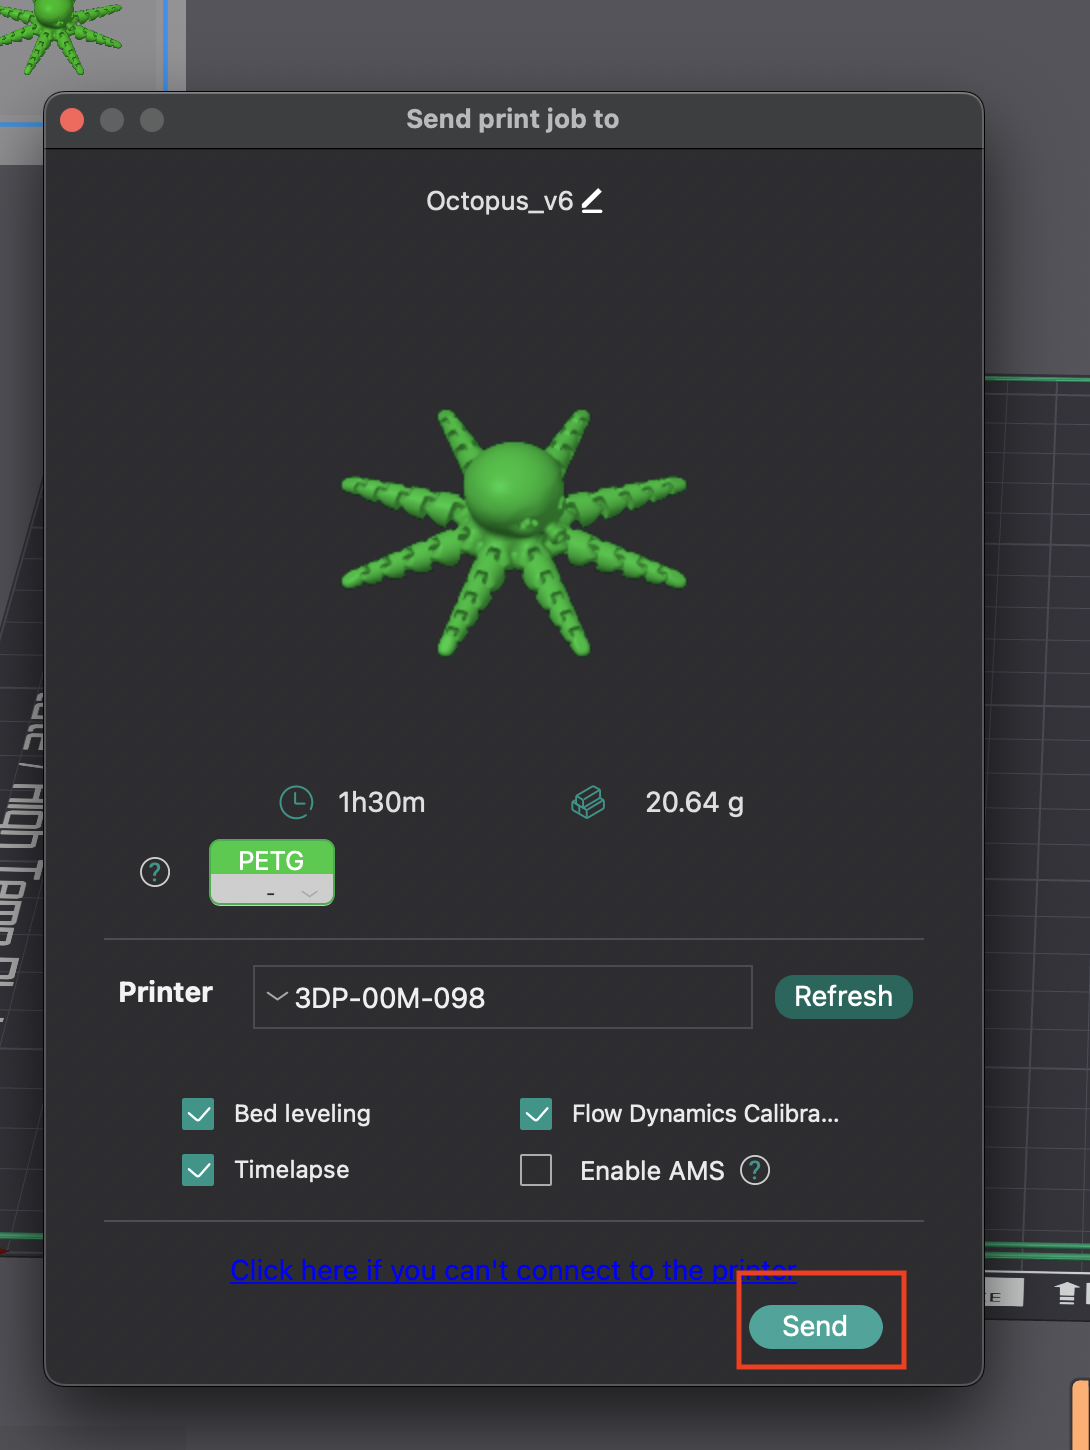
Print job pop-up
Hit “send” when you’re ready!
Non-BambuLabs Printers
This covers a huge amount of machines, some of which support printing over WiFi, and others which do not.
Printers that can print over WiFi
Select the WiFi icon next to your printer’s name under “Printer”
This will open up a “Physical Printer” dialog
Enter whatever name you want under “Save Machine as”
This will be what machine you use going forward
All system presets will be carried over to this new User-defined machine
Enter your printer’s IP address under “Hostname, IP or URL”
If you have access to your router management interface (usually a local website), I would highly suggest assigning your printer a static IP address. This will make it so you won’t have to change this setting if your router assigns it a new IP address dynamically.
If you need help, just google: “how to set static IP address” along with your router brand and version, and you should find a help article to walk you through it
Hit “Test” to test your connection to the printer
If this does not show as “Successful” you will need to troubleshoot why your computer cannot communicate with the printer
In most cases, this is most likely due to a typo in the IP address, or the printer needing to be re-joined to the WiFi network.
Make sure to hit “OK”!
Navigate to the “Devices” tab, you should see your printer’s web interface if everything is set up correctly.
Now just hit “Print plate” and it should prompt you to remotely start the print job
Hit “Upload and Print” to upload the sliced file to your printer, and have it initiate the print

WiFi Icon
Select the WiFi icon to open up the Physical Printer dialog

Physical Printer dialog
Here, you enter a new name for your physical printer and the IP address. Make sure you hit “Test” to confirm everything is working, and then click “OK”
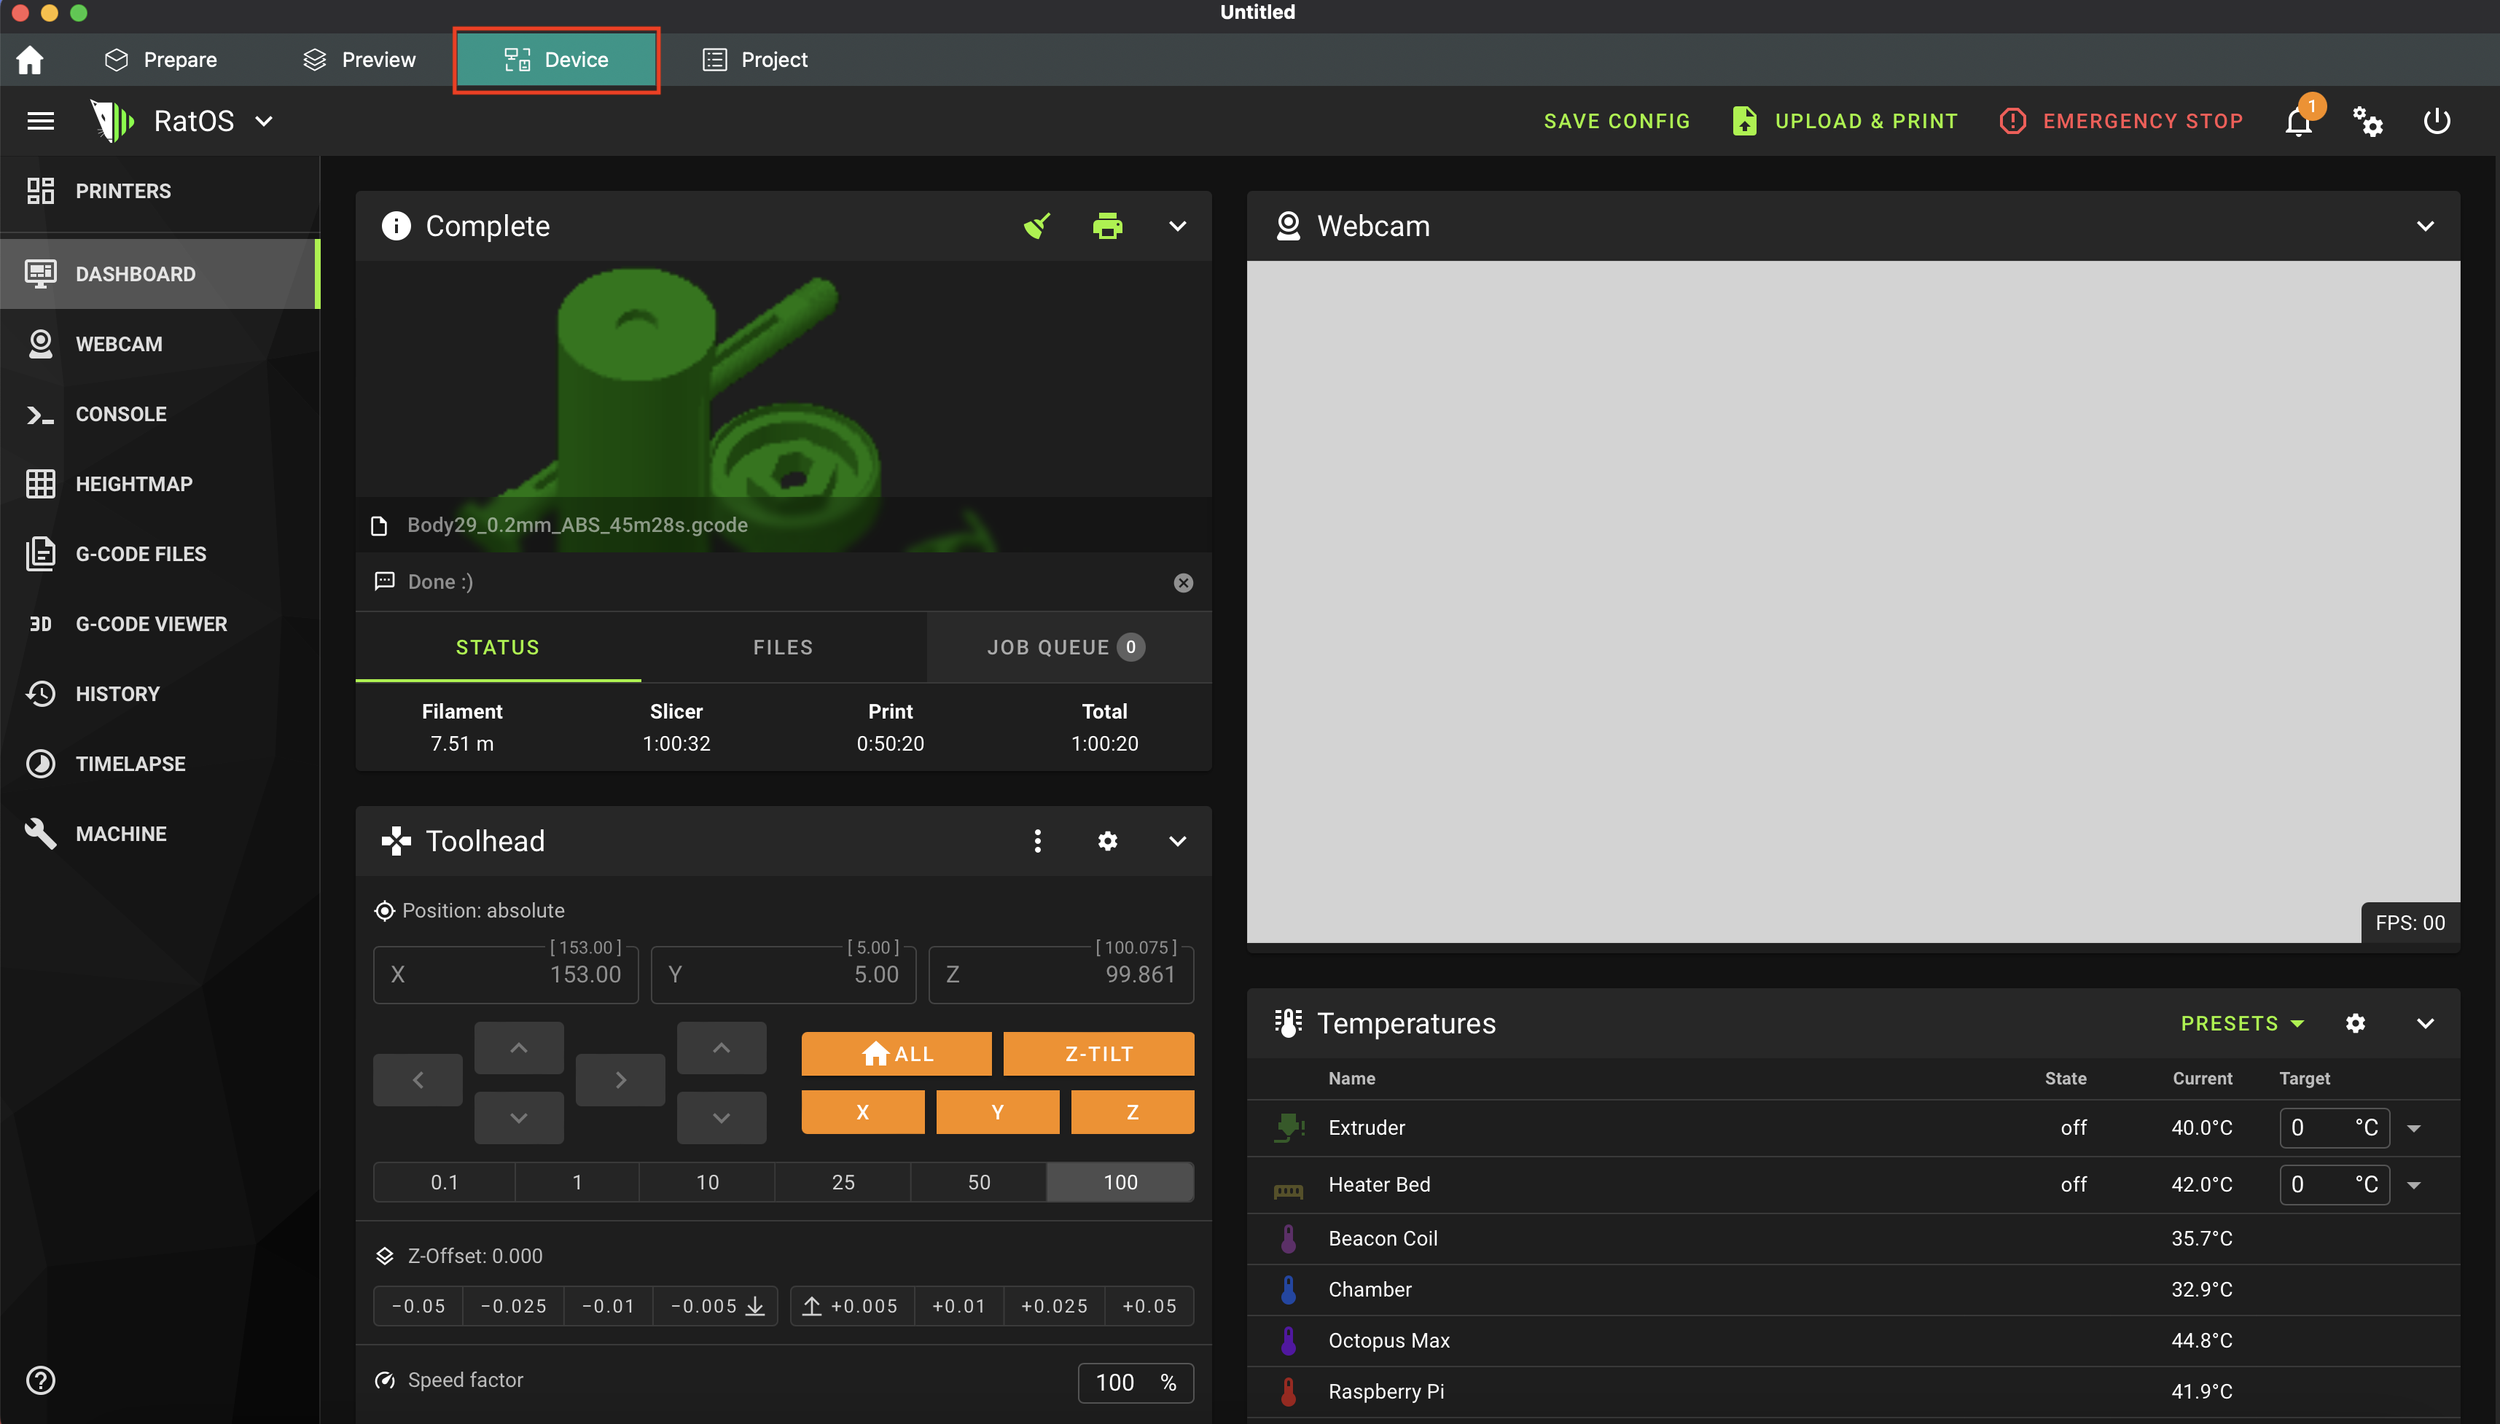
“Devices” Tab
If everything was set up correctly, you should see your printer’s web interface

Print Dialog
You should see this after hitting “Print plate”
Printers that can’t print over WiFi
Unfortunately, this is a very manual process.
Select the down arrow to the left of “Print plate”
Select “Export G-code file” from the dropdown
Click the “Export G-code file” button
Select where you want to save the file on your computer locally
Grab a USB stick and put the saved file onto that USB stick
Plug the USB stick into your printer
Use your printer’s screen or control mechanism to select the file to print

Select the dropdown
Located the “Export G-code file” button in the dropdown
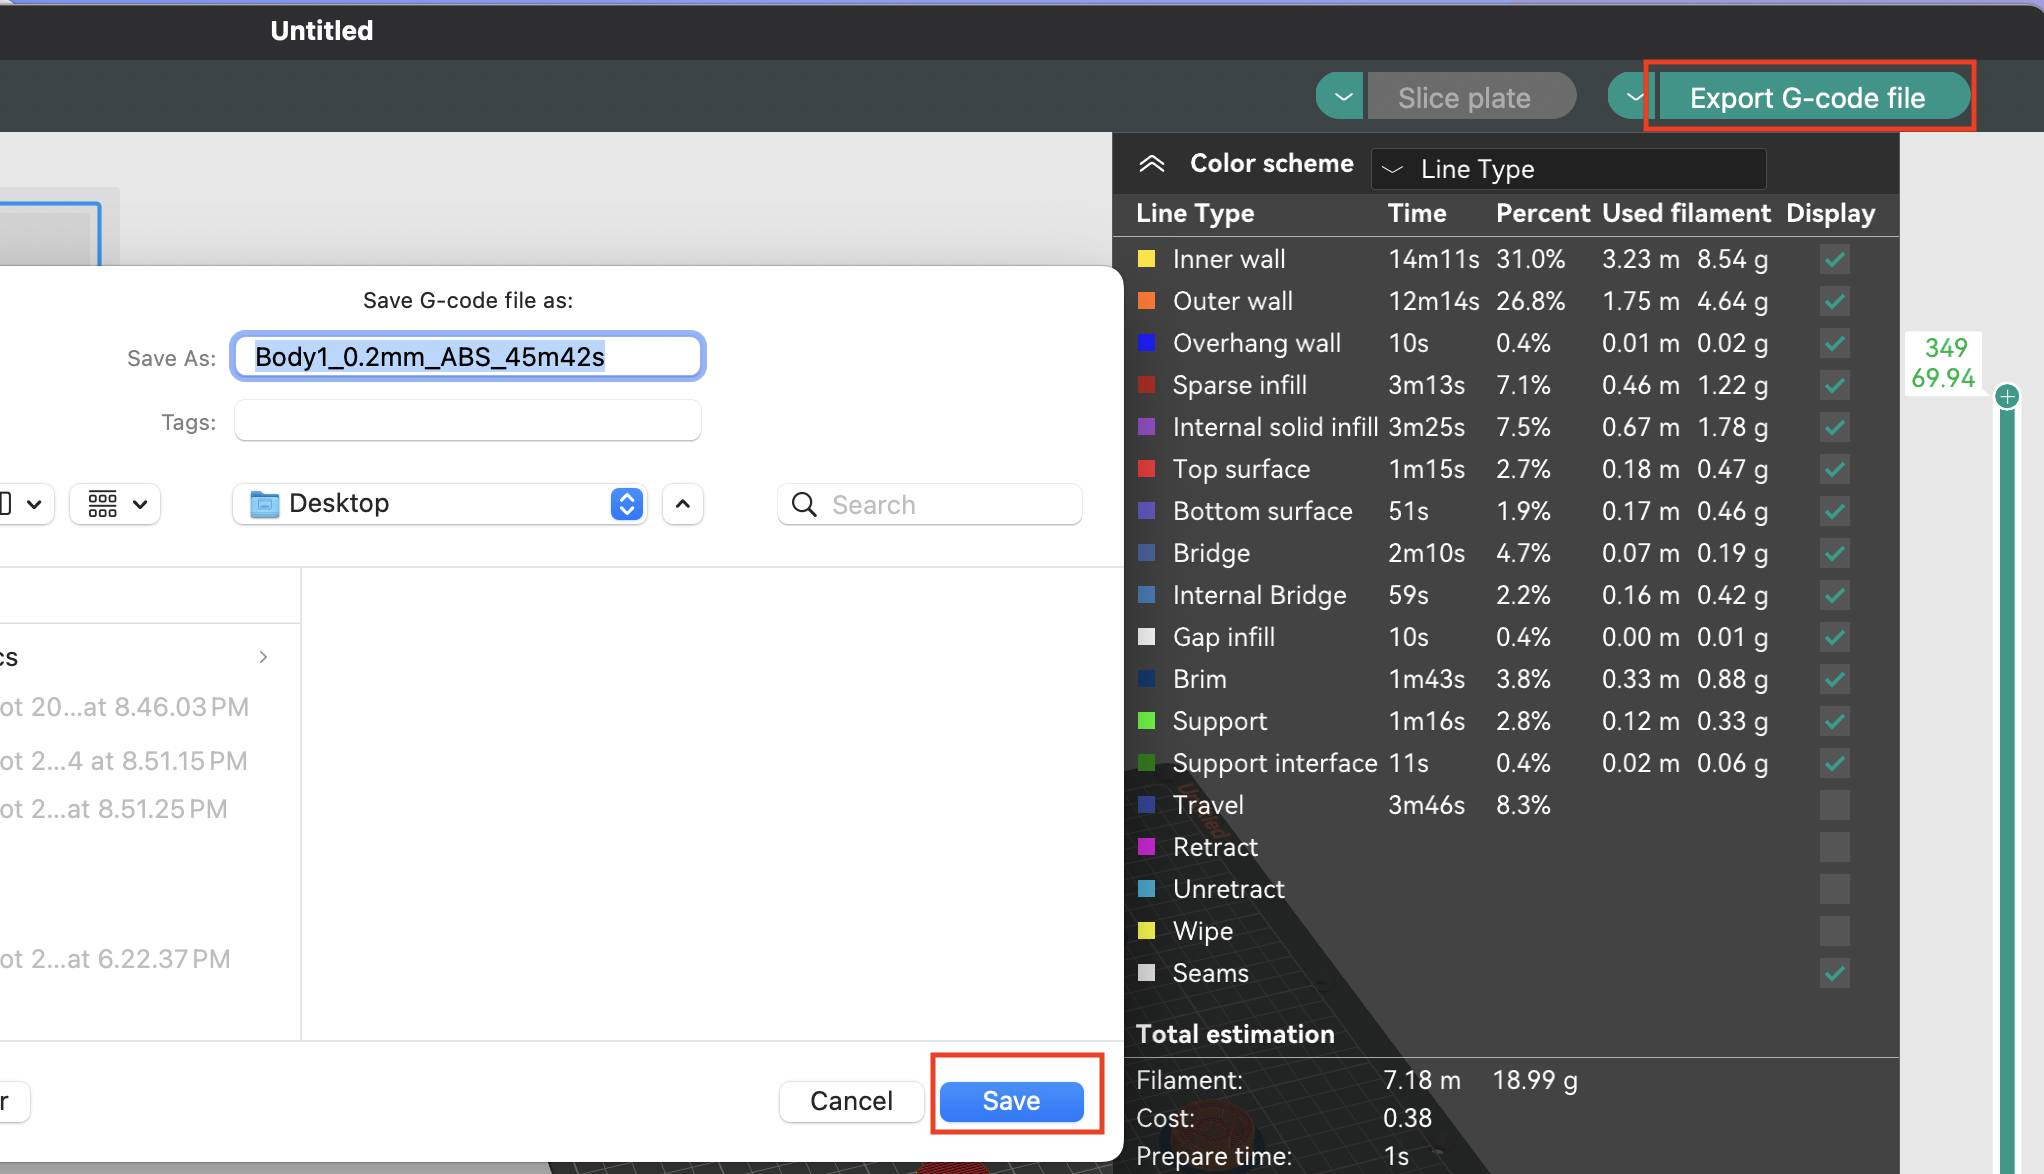
Export to G-code file
Hit “Export to G-code file” and choose a place to save the file.
Grab your model!
Nice work, you successfully went from file to physical!

Get your printed model
Looks like I have some tuning to do!
Happy Printing!
Suggestions or Improvements to this article?
Leave a comment below